After some cursing, cramping, and contorting the cage is now welded in. Also, I have about half of the gussets in place. The gussets are simple to fit, basically a little time with the grinder and they are ready to go. Tack weld them once the fit, then come back and finish weld them in.
Monday, December 27, 2010


Saturday, December 25, 2010
Merry Christmas, and the cage is almost done
Yesterday I was able to weld in most of the cage. I took a couple breaks throughout the day so I probably could have got it done yesterday. I have to weld the dash bar, roof diagonal, and the 1.5 of the firewall tubes to the firewall.
I will finish up tomorrow AM and post some photos.
So, as this portion of the project comes to a close I have been reviewing my previous schedule and realise that I am way behind schedule. I am regrouping on what to do next. Now that the portion that I feared most is coming to an end, its nice to see that some projects that I am comfortable with are coming up next.
Once the car is back on the ground, I will be starting the suspension, brakes, steering, etc.
After that will be engine maintenance, etc.
Once this is done we will be painting the interior. It may actually happen before. I will see how the weather cooperates.
Sunday, December 12, 2010
More progress
I worked on finishing up the roof diagonal. I also welded underneath the compound joint on the diagonal. This simple task has turned into a major PITA. I had all kinds of problems welding today. Despite preheating, cleaning with a wire brush, acetone, etc, etc. I was getting porous welds. Not everywhere, just in certain positions, mainly on the verticals and occasionally on the overheads.
Not having my certified welder neighbor at hand today, I ran through the troubleshooting process.
-Is it me? No gun position was good, stickout was good.
-Is the current appropriate? I tested back and forth and found that the current was appropriate.
-Wire feed? once again after testing it proved to be appropriate
-Sheilding gas. There was still gas in the tank. Gas is flowing out the nozzle. The nozzle is clean and free from obstruction. Is the flow too high or too low? Tested the too high theory and found it made the problem worse. So I tested the too low theory, BINGO! That was the problem. The setting is much higher than I had anticipated would be required. Regardless, this is apparently the setting that is needed.
I am not sure if the cold air exacerbated the issue or not. I am also running low on gas so this could also have something to do with my issues today. I was also running the heater which I am sure introduced some draft to the area in which I was welding.
I then spent the rest of the time grinding out the bad welds and laying good weld. At this rate, it will be done next June, but hopefully with my new settings, I will be able to move along a little quicker.
After welding underneath, I realized that I now need to refit the joint. I have yet to do that, I needed to shower to get to dinner and then work afterward. Also the weld on the rear down tube looks much nicer in person, the flash seems to exaggerate the shape of it. It is much flatter and much less globular in person.
 This is the SOB that was giving me fits today. Basically where it is covered by the tube continually would develop a porous weld. Ugh. Obviously the diagonal tube was not there when I was welding.
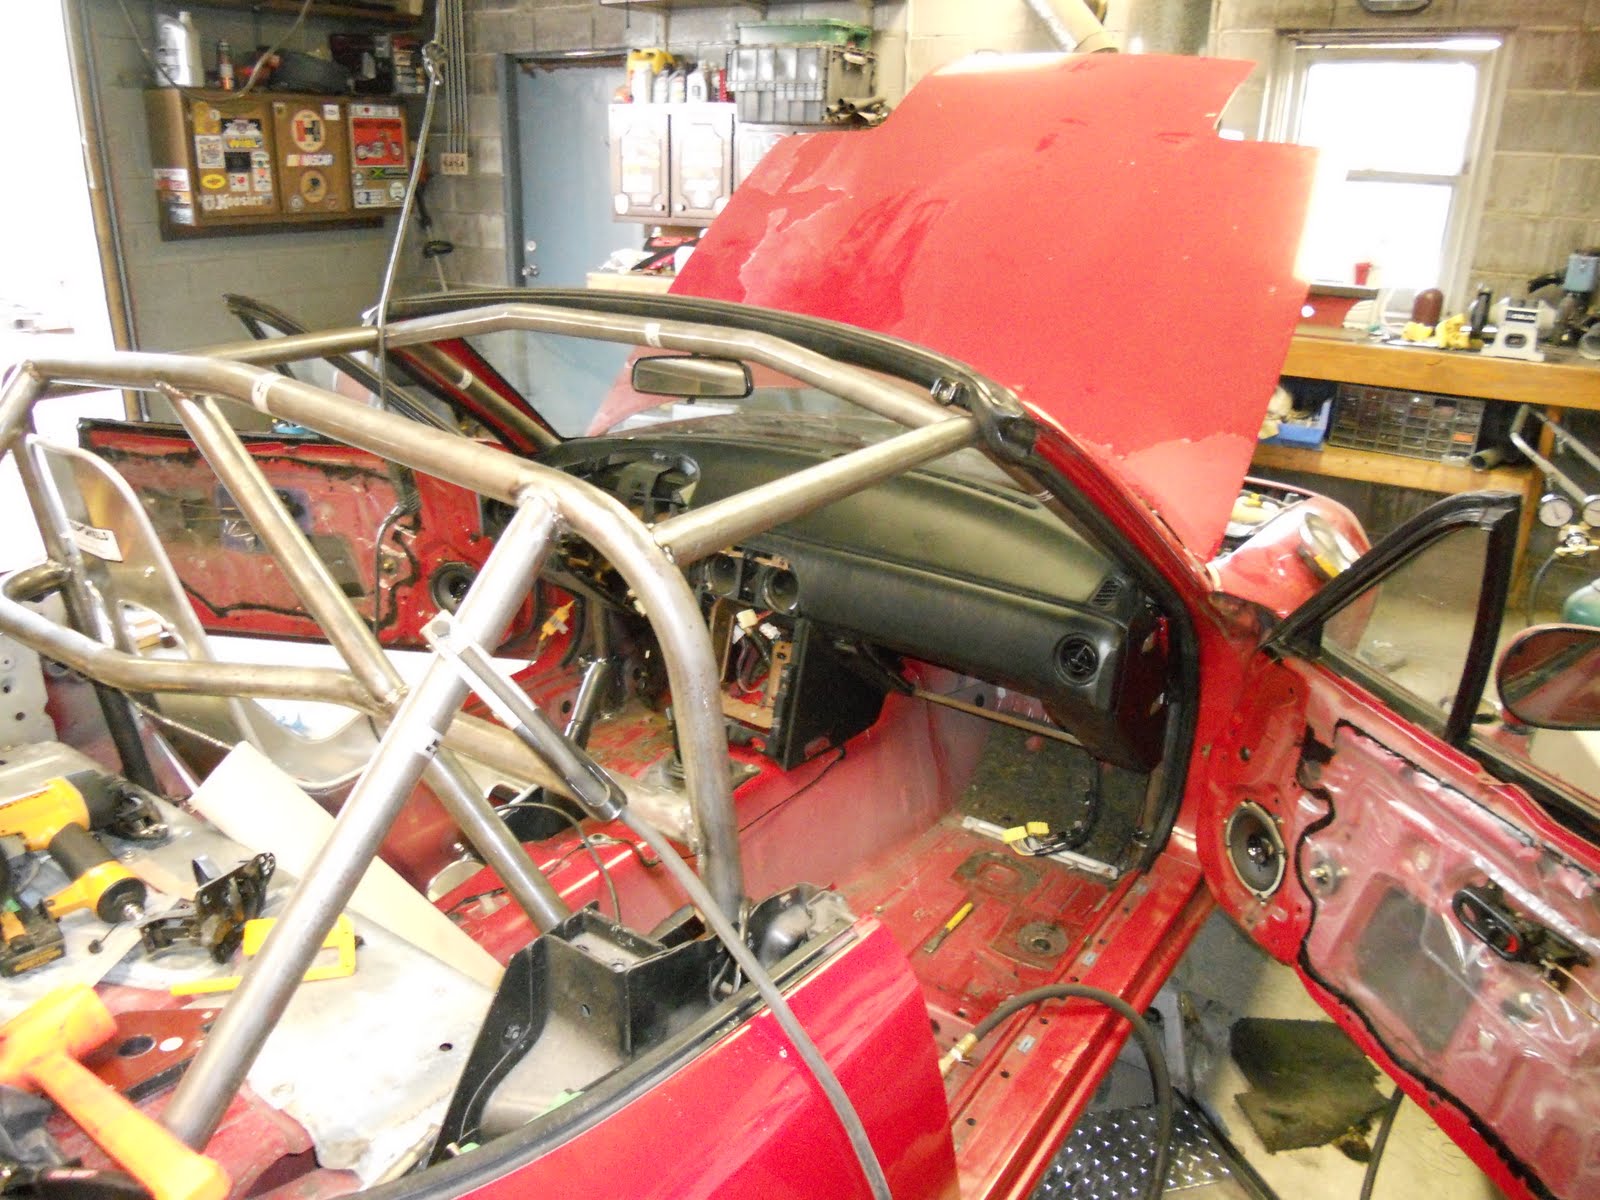
 The cage is back in the car.
Not having my certified welder neighbor at hand today, I ran through the troubleshooting process.
-Is it me? No gun position was good, stickout was good.
-Is the current appropriate? I tested back and forth and found that the current was appropriate.
-Wire feed? once again after testing it proved to be appropriate
-Sheilding gas. There was still gas in the tank. Gas is flowing out the nozzle. The nozzle is clean and free from obstruction. Is the flow too high or too low? Tested the too high theory and found it made the problem worse. So I tested the too low theory, BINGO! That was the problem. The setting is much higher than I had anticipated would be required. Regardless, this is apparently the setting that is needed.
I am not sure if the cold air exacerbated the issue or not. I am also running low on gas so this could also have something to do with my issues today. I was also running the heater which I am sure introduced some draft to the area in which I was welding.
I then spent the rest of the time grinding out the bad welds and laying good weld. At this rate, it will be done next June, but hopefully with my new settings, I will be able to move along a little quicker.
After welding underneath, I realized that I now need to refit the joint. I have yet to do that, I needed to shower to get to dinner and then work afterward. Also the weld on the rear down tube looks much nicer in person, the flash seems to exaggerate the shape of it. It is much flatter and much less globular in person.
 This is the SOB that was giving me fits today. Basically where it is covered by the tube continually would develop a porous weld. Ugh. Obviously the diagonal tube was not there when I was welding.
 The cage is back in the car.
Saturday, December 11, 2010
The cage is back in the car
I got the cage back in the car today. I have everything thoroughly tacked in, the outsides which are inaccessible when in the car, have been welded while outside of the car. I am working on fitting the roof diagonal. After this it will be time to finish weld.
As usual, I will get some photos up tomorrow.
As usual, I will get some photos up tomorrow.
Sunday, December 5, 2010
Photos
Here are photos from the progress made yesterday. Very exciting progress. Regardless, still alot of work to go. Hopefully, I will find an evening this week to get the welding done, then refit and finish weld this upcoming weekend.
 I may do some cleanup while all of the halves are out of the car. It will be much easier to do so while I can freely access the car. All of the dark gray dirt looking stuff are metal shavings. Ugh, a nightmare to clean up.
 Right hand cage half.
 Left hand cage half.
 I may do some cleanup while all of the halves are out of the car. It will be much easier to do so while I can freely access the car. All of the dark gray dirt looking stuff are metal shavings. Ugh, a nightmare to clean up.
 Right hand cage half.
 Left hand cage half.
Saturday, December 4, 2010
Door bars in...
I have fitted all of the door bars, cross bars, etc. I have now removed the cage halves for welding the sections that I cannot access in the car. I have a bit of a headache today so, I will not be finishing it up tonight. I will snap some photos tomorrow. Again, I hope to have the cage finished up within the week.
Wednesday, December 1, 2010
Parts have arrived
The upper door bar has arrived, now I just need to install it. I hope to have some time later this week. I could, in theory, have the cage wrapped up in a week or so. I am just running 2 months behind, but I am glad it will be done right.
Sunday, November 28, 2010
Driver side pretty much complete
Now I am pretty much done with the drivers side. I am eagerly awaiting my other upper door bar. My vendor for the cage is excellent in every way. Good service, good product, great support.
I should be able to get the other side done this week, well maybe next weekend. I am approaching crunch time on a work project that I will need to finish up after hours. It is also the reason that I did not get much done over the long weekend.
Here are some picks. Its looking pretty awesome.


I should be able to get the other side done this week, well maybe next weekend. I am approaching crunch time on a work project that I will need to finish up after hours. It is also the reason that I did not get much done over the long weekend.
Here are some picks. Its looking pretty awesome.


Monday, November 22, 2010
Upper door bar
I got the upper door bar fitted. I had to trim a little more in the doors, regardless, its a great fit this time. Now I am ready to fit the other upper door bar, and then the bars that fit between the upper and lower door bars.


Monday, November 15, 2010
More roll cage progress
On Saturday evening my certified welder neighbor came over and reviewed my previous work and helped out with welding in the landing plates on the firewall. Luckily he said my welds looked pretty good, and that any failure would not be likely from my welding. That was reassuring. It was also nice that after he played with the welding and some scrap tubing he came to the same optimal settings on the welder that I did.
Sunday, I finished up the firewall tubes. Now I just have to mount the upper door bars, I am a little gun shy on doing so after cutting one of them too short on my first attempt. So I will use some caution, and take my time getting them cut and fitted. In reality after the door bars, I have one major piece to add to the cage then it is time for gusseting, finish welding, etc. I hope to have the roll cage done by December. I have definitely behind schedule on this one. At the same time, this was the one portion of the project I was most apprehensive, skeptical, or even fearful of.
So, what have a learned from the process thus far?
Practice your welding, if there is any question of its integrity, grind it out and address the problem. There are plenty of resources online to help you figure out what is going awry.
Tube fabrication is not equivalent to black magic. I found it very helpful to make some of your own tools. You will learn other tricks as you go. Remember, the location of the cut, the angle of the notch and the indexing of the tubing all have to be measured. There does not seem to be a single good way of doing all of these in any given circumstance.
Buy extra tubing, you will inevitably cut something short, at the wrong angle etc. If you are lucky it will be a straight piece of tubing that you can simply take the extra that you just bought and cut it to length. If you do not have to use it, you have the start of an excellent "cheater bar" for yourself and anyone who helped you along the way that needs one.
Do not skimp on tools. Cheap ones fail, good ones (and usually more expensive) do not. I have burned up a right angle die grinder, I have a cut off tool on its last legs. Both of these were cheap tools. I have several other tools that perform the same as they did out of the box. These cost about 2-3 times of the cheapo ones and have seen just as much use. I have also burned up 2 hand drills, both were old and probably undersized for the job. The right tool, a good tool, for the job will save you headaches and money in the long run.
I am sure there are still lessons to be learned and some that have not yet popped into my mind. As time clarifies the previous few months of work, I am sure more will come on this subject.
Thursday, November 11, 2010
Status Update
Its been a few days since my last post. I wanted to provide an update. In the process of installing one of the door bars, I cut one too short. I am currently exploring my options for replacement.
In addition, I have been working quite a few hours outside of business hours. So my time has been a bit of a commodity. So, progress will go on, but until mid December it will be at slower pace.
In addition, I have been working quite a few hours outside of business hours. So my time has been a bit of a commodity. So, progress will go on, but until mid December it will be at slower pace.
Monday, November 1, 2010


Sunday, October 31, 2010
Doors gutted, started on dash bar
Over the weekend, I started with trimming and test fitting the dash. Yesterday was a bit of awash and did not get much done. However, today I started on the Dash bar and had some friends helping with gutting the doors, notching tubing etc.
On top of this we made a couple tools for the indexing of the tubing for notches.
 Test fitting the dash.
 Dash fit.
 Ready to fit the dash bar at this point.
Wednesday, October 27, 2010
Other door frame bar and eyebrow
Made some progress with the help of a friend this evening. The other door frame bar is in place and tacked. The bar on the top of the windshield is also in place. Before placing the dash bar we pulled the heater core and removed the carpet underneath. While this was out of the way we also took the time to remove the noise deadening mat along the firewall. All of it was pretty simple and sorry I do not have any photos of this evening. I will catch you up on the next post.
Monday, October 25, 2010
Front Portion of the Cage
I have recently been forced to work on my flexibility. Getting under the dash to trim dash mounts, weld in front cage landings, etc. I hurt. I have a headache. However, I still feel good. Its truly amazing to think that I have built this car thus far and to see the progress thus far.
The photos below show one of the door frame bars almost fitted. There was still some trimming to do. In reality this peice is now fitted and tacked. The other door frame bar is now as far a long as this one was when photographed. Sorry, I forgot my camera in the house.


 After final fitment, this is actually about midway up the bend.
Sunday, October 17, 2010
Rear Section of the Roll Cage


Sunday, October 10, 2010
Seat mounting
In order to get the cage built appropriately, one must mount their seat. This allows you to get the appropriate geometry on the harnesses.
My seat of choice is the Ultrasheild Spec Miata seat. Since I am a rather large guy, I had to get the 17" seat. This creates its own set of challenges. Basically, the transmission tunnel will interfere with the seat so one has to modify that slightly.

After mocking up the seat a few times and having my wife take measurements of clearance to the top of the main hoop I finally found a position that would allow for maximum clearance and comfort. Well, actually its a compromise between the two. I then started fabricating the seat mounting bracket. The bracket above is still not fastened down in the back and there will be an additional cross piece tying the rear legs of the bracket together. The bracket is fabricated from 3/16" x 1.5" steel strap.

Here is the seat in place with the cover removed. It has a nice lay back angle which gives me a nice bit of clearance under the top of the hoop. In addition I would assume it will help keep me from sliding forward and smashing my junk on the anti-submarining strap under heaving braking.
There are some tight fits in various places. This sort of thing should be expected in such a tight cockpit. Notice the side of the seat to the main hoop, also the top of the seat to the rear down tube.

While mocking everything up the various pieces of the bracket was trimmed to fit then tacked together. Once everything was trimmed and tacked, I then welded the items together.
I should have the seat finished up in the next day or so, once this is done it will be a matter of fitting up the harness bar to sit at the appropriate location.
My seat of choice is the Ultrasheild Spec Miata seat. Since I am a rather large guy, I had to get the 17" seat. This creates its own set of challenges. Basically, the transmission tunnel will interfere with the seat so one has to modify that slightly.

After mocking up the seat a few times and having my wife take measurements of clearance to the top of the main hoop I finally found a position that would allow for maximum clearance and comfort. Well, actually its a compromise between the two. I then started fabricating the seat mounting bracket. The bracket above is still not fastened down in the back and there will be an additional cross piece tying the rear legs of the bracket together. The bracket is fabricated from 3/16" x 1.5" steel strap.

Here is the seat in place with the cover removed. It has a nice lay back angle which gives me a nice bit of clearance under the top of the hoop. In addition I would assume it will help keep me from sliding forward and smashing my junk on the anti-submarining strap under heaving braking.
 |  |
There are some tight fits in various places. This sort of thing should be expected in such a tight cockpit. Notice the side of the seat to the main hoop, also the top of the seat to the rear down tube.

While mocking everything up the various pieces of the bracket was trimmed to fit then tacked together. Once everything was trimmed and tacked, I then welded the items together.
I should have the seat finished up in the next day or so, once this is done it will be a matter of fitting up the harness bar to sit at the appropriate location.
Sunday, October 3, 2010
Roll cage, A/C, the funeral for a few power tools
The roll cage build has begun. The main cage is now tacked in place as are the rear down bars. You know its much like building a shed. Except the shed is made from steel tubing, welded, and inside of a car. Oh yeah, and your life may depend on on it not collapsing. The mentioning of possible death leads me into my latest tool death toll. In the last week I have killed two 3/8 in plug in drills. I seized the bearings on a 40 year old black and decker drilling a series of 8 holes through 1/4" steel for a set of wheel casters (very cool, my car is now sideways in the garage). The other drill (a 35 year old craftsman) seems to have sheared a large number of teeth off one of its gears. It mets its demise while trying to drill through the rear deck with a 1.5" hole saw. It turns out once the hole is started, its just as easy to use a set of aviation snips.
On other fronts, the air conditioning has been removed from the car. A friend evacuated the nasty stuff from the system and I removed all of the parts once that was done. In all it was about an hour worth of work. Not to bad, I am guessing all parts combined it probably saves 30 lbs of weight.

(The departed.)

(Rear landing, down tube, etc.)

(Can anyone say weight savings!)

(More weight savings!)

(Its starting to look like a roll cage!)
Thursday, September 2, 2010
A long weekend...Race prep about to begin
The rust repairs are just about complete. It will still need paint, but that can wait until the rest of the car gets painted.
I have ordered the roll cage and it should be in in a week or so. I reviewed the prep document provided by the manufacturer and I am largely ready to go. But, I have a couple items I will need to take care of this weekend.
Also it will be time to do some needed maintenance on the daily driver. Oil change, plugs, brake inspection tire rotation.
Friday, August 20, 2010
Spec Miata Racing
In case someone doesn't know what spec miata racing is, view the below videos from the two major racing organizations which have Spec Miata classes.
SCCA Runoffs 2009?
NASA Spec Miata Racing at Mid Ohio
SCCA Runoffs 2009?
NASA Spec Miata Racing at Mid Ohio
Rust Repair
As I tear into this car a few places that need repair of become apparent. Luckily none of these are structural locations in the car.
First place was that passenger side rocker just in front of the rear wheel.

After peeling back the rocker/quarter panel, I came to the quick realization that the dime size rust spot was a little more involved internally. After peeling this back I cleaned a solid pound of dust and dirt out of the inner rocker.

A view from the inner wheel well. I trimmed out the swiss cheese like areas from the inside here as well.
Now for reconstructive surgery and rust proofing...
Wednesday, August 4, 2010
A plan takes shape
After analyzing my personal finances, time constraints, and everything I need to purchase, a schedule has now been formulated.
The tentative schedule is as follows.
The tentative schedule is as follows.
- August - Purchase roll cage, finish prep for roll cage install and other misc items that can be accomplished.
- September - Install roll cage, purchase seat, fire system, nets, master cut-off, belts
- October - install items purchased in september, purchase spec suspension, timing belt, sample port, hoses, belts, suspension rebuild items.
- November - Install previous items, purchase calipers, pads, brake lines, tow hooks.
- December - Purchase lots of kerosene for the shop furnace and wheels, tires, steering wheel hub. Install all previously purchased items.
Tuesday, August 3, 2010
Progress is made
We have made some progress towards the building of our spec miata.
- The interior is largely gutted
- Rocker panel rust repair is underway
- Power steering rack has been removed and converted
- The trunk is gutted
 The largely gutted interior.
 More of the interior
 I was not worried about damaging the boots on the tie rod ends as they looked like this before I separated them from the knuckles.
 The steering rack converted to a manual rack.
 a 3/8" brass flare plug works well to plug one of the power steering lines. The other one was folded over and crimped as in the write up on the flyin' miata site.
Wednesday, June 23, 2010
A successful day
Yesterday,
I replaced the tires with a virtually new set of used pirelli p7000's. They were already mounted on miata wheels. It was an excellent deal I found on craigslist. After replacing the tires the first thing I noticed was how much quieter the car was while driving. Wow. They certainly beat the old wore out, bulged, generic tires that were on the car. The next thing I noticed was that the car was much better behaved when cornering.Then for the bad, it didn't seem to fix the pull on deceleration/acceleration. So, today I had an epiphany. I swapped the back to the front and the front to the back on the passenger side. Double checked and corrected air pressures, and voila. The pull appears to be gone, or minimized to the point of not being noticeable. After I install the spec miata suspension I will take it to the performance alignment shop for a full alignment.
I took some time to replace the old air filter, or should I say air blocker, and the PCV valve.
On top of all that, I was greeted with a package on the doorstep. It was the factory service manual. Despite getting a looseleaf version when I ordered a bound version, I am happy with the purchase. When compared to some of the other brands of service manuals, its almost always pays to purchase a factory service manual.
Sunday, June 20, 2010
First day digging in
Today, I spent sometime digging around the car. Overall it appears solid. I found a few things that I expected but it was nice to see some of the symptoms explained.
The car tended to pull to the left when accelerating and then back to the right when letting off the gas. It felt very similar to when one has a donut spare tire on their car, but not as exaggerated. So I did a little tire inspection and realized that one of the fronts is virtually new while the other three on the car are quite worn and ready to be replaced.
Actually they are all ready to be replaced because the odd tire has a giant goose egg on it. As illustrated by the following photo.

I found a few other things while digging around. Like a plug wire that seems to have been repaired with electrical tape.

It needs some fluids changed. I opened the clutch master cylinder and its virtually opaque and certainly not the right color. In the image below, it looks like you can see the bottom of the reservoir however, that's actually the reflection of the top of the reservoir. The brake fluid did not look much better.
 Also, I found quite possibly the dirtiest air filter I have ever seen. It was impressively dirty, which could explain why the car seems to run just a little rich. It could also be the fact that the injectors are probably due to be serviced. Regardless, its a simple variable to eliminate.
So in the near future, I have several things to get squared away. Fluid changes, valve cover gasket, tires, plug wires, plugs, inspect wheel bearings, and slave cylinder.
New Contacts
In a chance encounter at a local store yesterday. I happened to meet a member of the Indy Miata Club. We ended up talking about the cars and what various people do with them. I also got the name of a local person and shop who has experience with spec miatas and the build process. I will be getting in contact with this person or his shop after I get through some of my inspection and maintenance.
Introduction

This blog will be devoted to my experience of building a spec miata from a 1990 red mazda miata.l I have worked on cars for the majority of my life. It started as a matter of necessity and then became a hobby. I have tackled a wide variety of repairs at various time, sometimes as a helper sometimes doing it all by myself. Sometimes I had the tools necessary sometimes I did not. I suspect this project will really be no different than many of my previous projects. There will be times where I will be flush with help. There will be times when I do not know what I am doing and there will likely be times where I do not have the right tools. Honestly, these are all reasons why to take a on a project like this. Time spent with friends, time spent alone, opportunities to learn new things, and excuses to buy new tools.
Who knows if it will ever be complete. If I do not make it through the build process I will at least have a fun, safe and reliable car in which to autocross.
Subscribe to:
Comments (Atom)