Sunday, October 31, 2010

Doors gutted, started on dash bar


Over the weekend, I started with trimming and test fitting the dash. Yesterday was a bit of awash and did not get much done. However, today I started on the Dash bar and had some friends helping with gutting the doors, notching tubing etc.

On top of this we made a couple tools for the indexing of the tubing for notches.

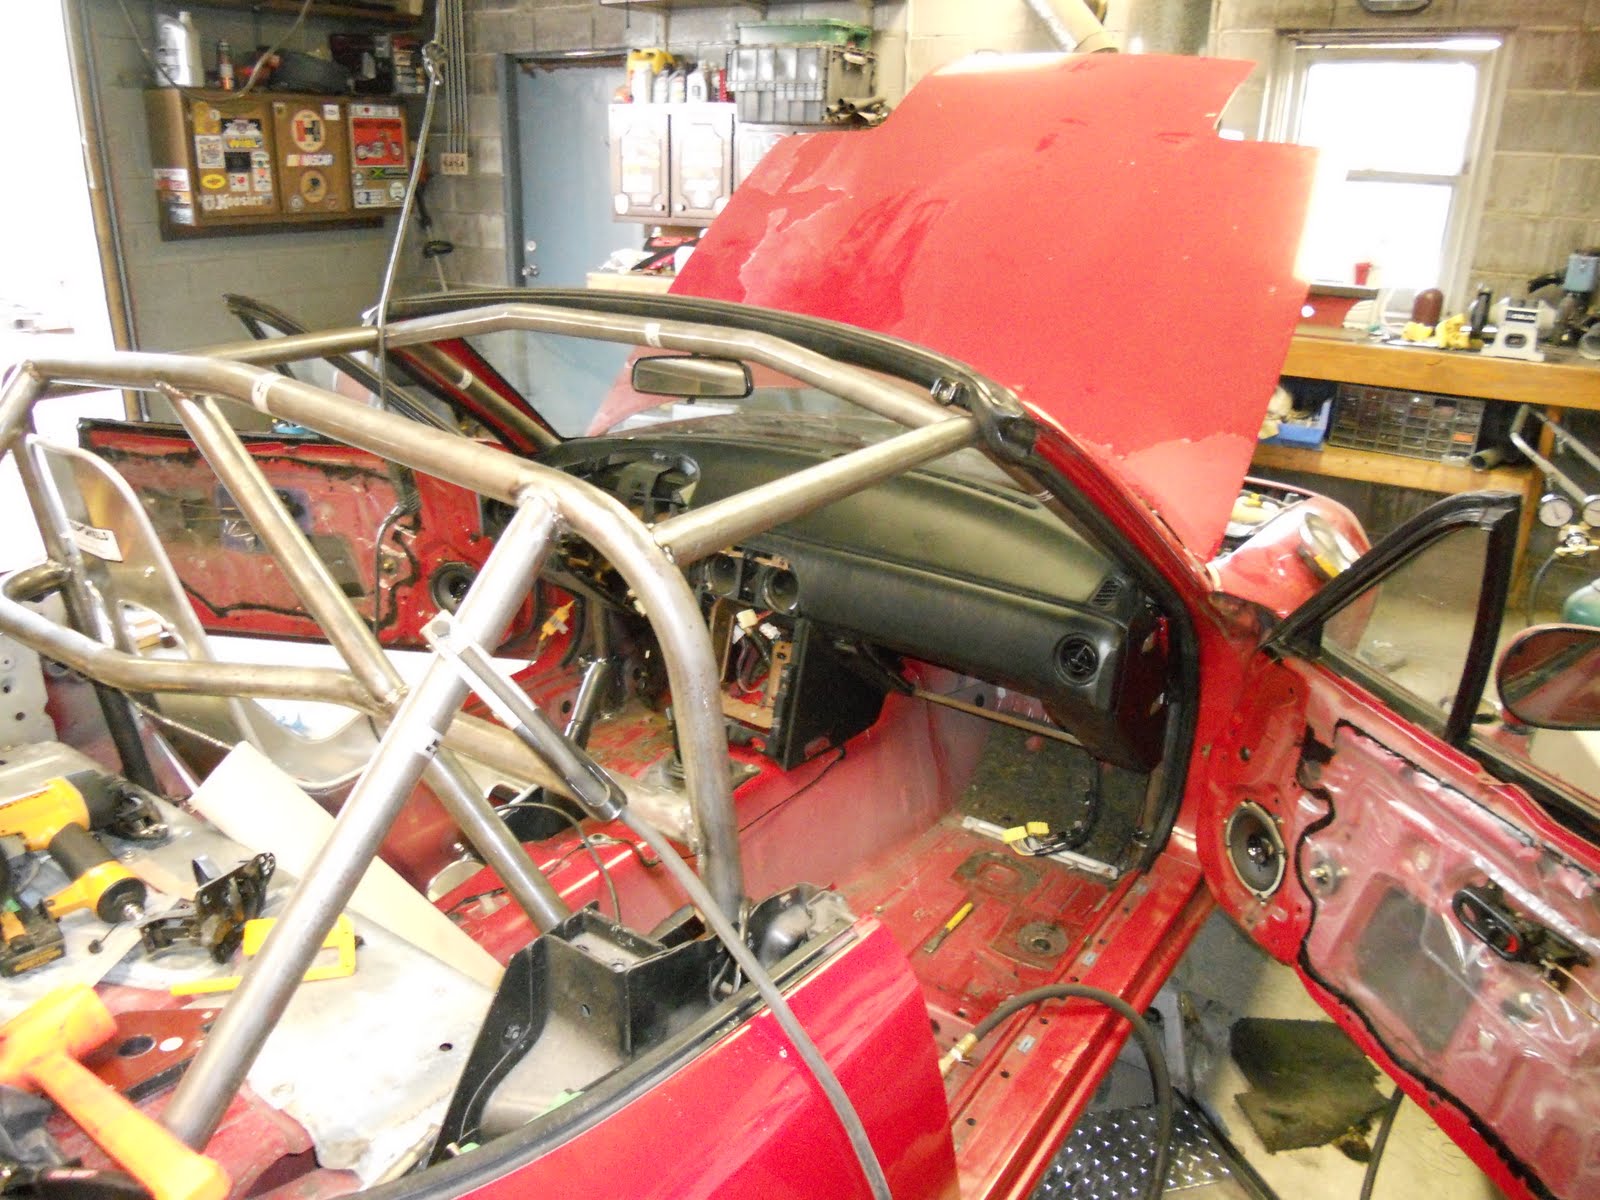
Test fitting the dash.

Dash fit.

Ready to fit the dash bar at this point.

Wednesday, October 27, 2010

Other door frame bar and eyebrow

Made some progress with the help of a friend this evening. The other door frame bar is in place and tacked. The bar on the top of the windshield is also in place. Before placing the dash bar we pulled the heater core and removed the carpet underneath. While this was out of the way we also took the time to remove the noise deadening mat along the firewall. All of it was pretty simple and sorry I do not have any photos of this evening. I will catch you up on the next post.

Monday, October 25, 2010

Front Portion of the Cage

I have recently been forced to work on my flexibility. Getting under the dash to trim dash mounts, weld in front cage landings, etc. I hurt. I have a headache. However, I still feel good. Its truly amazing to think that I have built this car thus far and to see the progress thus far.

The photos below show one of the door frame bars almost fitted. There was still some trimming to do. In reality this peice is now fitted and tacked. The other door frame bar is now as far a long as this one was when photographed. Sorry, I forgot my camera in the house.


After final fitment, this is actually about midway up the bend.

Sunday, October 17, 2010

Rear Section of the Roll Cage


The rear section of the roll cage in now in place. It is fully fitted and welded in. Before finish welding the rear portion of the cage in I fitted the hard top one last time to ensure nothing moved during the removal and re-fitting of the main hoop.


Next up, the front half of the cage...

Sunday, October 10, 2010

Seat mounting

In order to get the cage built appropriately, one must mount their seat. This allows you to get the appropriate geometry on the harnesses.

My seat of choice is the Ultrasheild Spec Miata seat. Since I am a rather large guy, I had to get the 17" seat. This creates its own set of challenges. Basically, the transmission tunnel will interfere with the seat so one has to modify that slightly.


After mocking up the seat a few times and having my wife take measurements of clearance to the top of the main hoop I finally found a position that would allow for maximum clearance and comfort. Well, actually its a compromise between the two. I then started fabricating the seat mounting bracket. The bracket above is still not fastened down in the back and there will be an additional cross piece tying the rear legs of the bracket together. The bracket is fabricated from 3/16" x 1.5" steel strap.


Here is the seat in place with the cover removed. It has a nice lay back angle which gives me a nice bit of clearance under the top of the hoop. In addition I would assume it will help keep me from sliding forward and smashing my junk on the anti-submarining strap under heaving braking.


There are some tight fits in various places. This sort of thing should be expected in such a tight cockpit. Notice the side of the seat to the main hoop, also the top of the seat to the rear down tube.


While mocking everything up the various pieces of the bracket was trimmed to fit then tacked together. Once everything was trimmed and tacked, I then welded the items together.

I should have the seat finished up in the next day or so, once this is done it will be a matter of fitting up the harness bar to sit at the appropriate location.

Sunday, October 3, 2010

Roll cage, A/C, the funeral for a few power tools

The roll cage build has begun. The main cage is now tacked in place as are the rear down bars. You know its much like building a shed. Except the shed is made from steel tubing, welded, and inside of a car. Oh yeah, and your life may depend on on it not collapsing. The mentioning of possible death leads me into my latest tool death toll. In the last week I have killed two 3/8 in plug in drills. I seized the bearings on a 40 year old black and decker drilling a series of 8 holes through 1/4" steel for a set of wheel casters (very cool, my car is now sideways in the garage). The other drill (a 35 year old craftsman) seems to have sheared a large number of teeth off one of its gears. It mets its demise while trying to drill through the rear deck with a 1.5" hole saw. It turns out once the hole is started, its just as easy to use a set of aviation snips.

On other fronts, the air conditioning has been removed from the car. A friend evacuated the nasty stuff from the system and I removed all of the parts once that was done. In all it was about an hour worth of work. Not to bad, I am guessing all parts combined it probably saves 30 lbs of weight.


(The departed.)


(Rear landing, down tube, etc.)


(Can anyone say weight savings!)


(More weight savings!)


(Its starting to look like a roll cage!)